The exact steps you need to take in order to record underwater sounds using a hydrophone by yourself!
Introduction
Our world is full of water, in fact 70% of the earth is water: Oceans, rivers, lakes, swamps and more, but we are failing to their true sounds and see their beauty. Today we are going to discuss how to record underwater sounds so you’ll be able to enjoy the true beauty of our nature.
After reading this article you’ll be ready to record underwater sounds using a hydrophone just by yourself.
Visit a good location
To Find the best place to record underwater you first need to understand your desired mission.
Small water sources
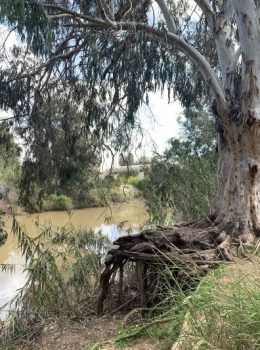
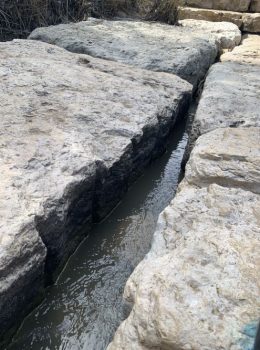
When aiming to record underwater sounds like water flowing in a river or small fish swimming that are fairly simple, it’s easier to find a good spot compared to recording sounds of marine life. Look for a river or water area that doesn’t have a lot of people around and where the water flows consistently. Quiet parts of rivers, streams, or ponds are perfect for capturing the soft sounds of water or the gentle sounds of small fish.
Picking a place where the water isn’t too deep is helpful for recording these sounds. Shallow water tends to have clearer sound, which makes recordings better. Also, places with interesting things like rocks or plants under the water can make the sounds more interesting as you can hear the water rubbing against them.
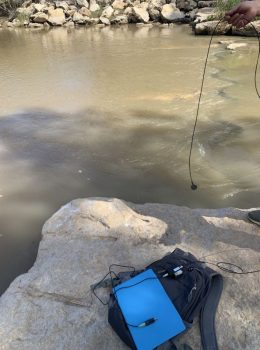
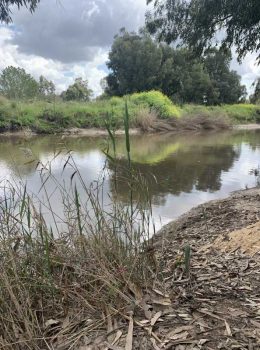
Last Friday we’ve been to Shorek Stream, it is a small river that after previous visits we knew has consistent water flow, small fish, and not too much people. By our standards it was a good place to record in, especially when we knew that we want quiet and meditative sounds.
Big water sources
On the other side finding a good spot to record underwater sounds in the ocean or bigger water sources is tricky and needs more planning. It is usually better to look for places with many different kinds of sea animals, like coral reefs or kelp forests, because they make lots of different sounds. You also want places where it’s quiet underwater, like in protected areas, so you can hear the sounds clearly. It’s important to think about how deep the water is too, because different animals live at different depths. Also, things like water temperature and the current season can change where animals hang out, so you need to keep those in mind too. And of course, you have to think about how easy it is to get to the recording spot and whether it’s safe.
Accessibility and safety remain important considerations in both categories, especially when venturing into natural environments. Ensuring easy access to the recording site and taking necessary precautions to prevent accidents or damage to equipment are very important.
By thinking about all these things, you will find the perfect place to record underwater sounds.
Choose the right hydrophone and equipment
Hydrophones and purpose
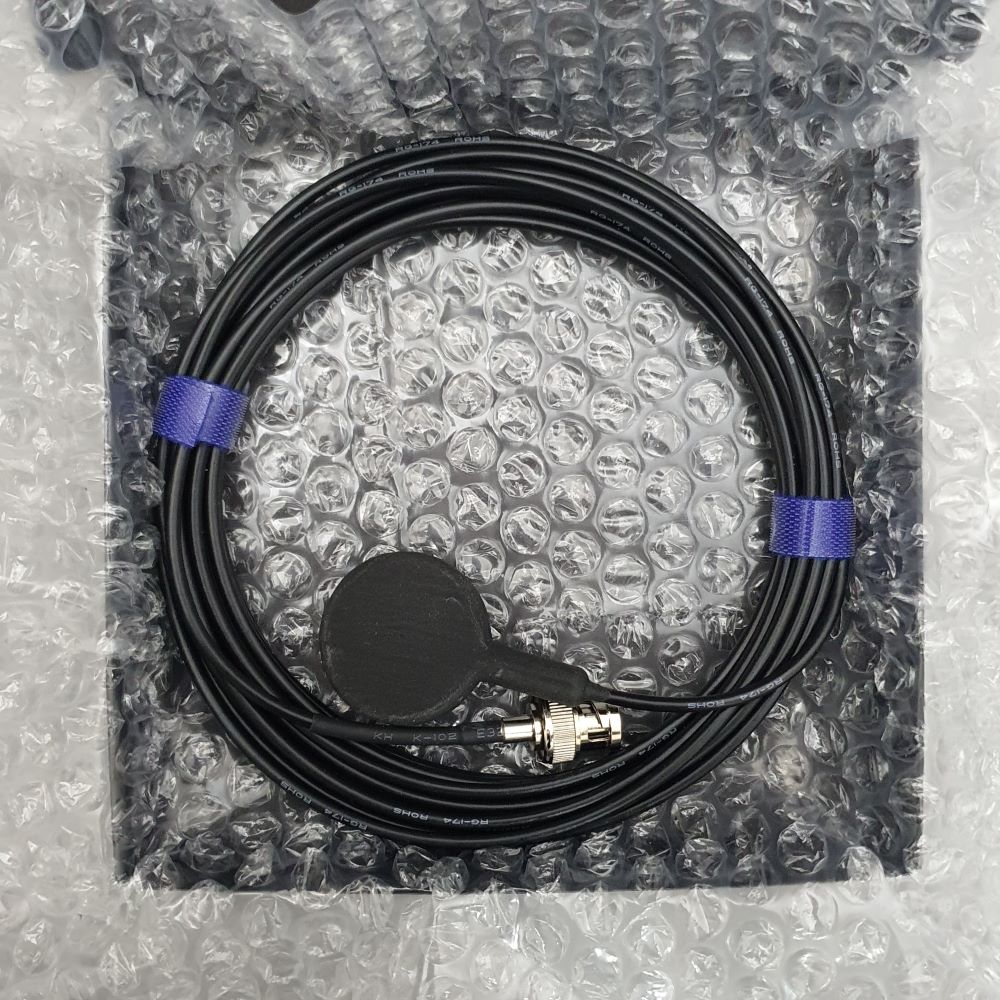
To choose the perfect hydrophone to record underwater sounds, it’s essential to consider several factors. Firstly, determine the specific sounds you want to capture, whether it’s the low-frequency calls of whales or the high-frequency clicks of dolphins. Different hydrophones are designed to excel in capturing different frequency ranges, so matching the hydrophone’s capabilities to the target sounds is crucial. In some use cases you’ll need a calibrated hydrophone, to understand the difference visit our guide.
Additionally, consider the depth and conditions of the recording environment. Some hydrophones are built to withstand greater pressures at deeper depths, while others may be more suitable for shallow waters or even surface recordings. It’s also important to know your hydrophone’s sensitivity and signal-to-noise ratio, as these factors determine the clarity and fidelity of the recordings. Finally, consider practical aspects such as budget, size, and compatibility with recording equipment.
By carefully evaluating these aspects and selecting a hydrophone that best fits your recording needs, you can ensure optimal results and a rewarding underwater listening experience.
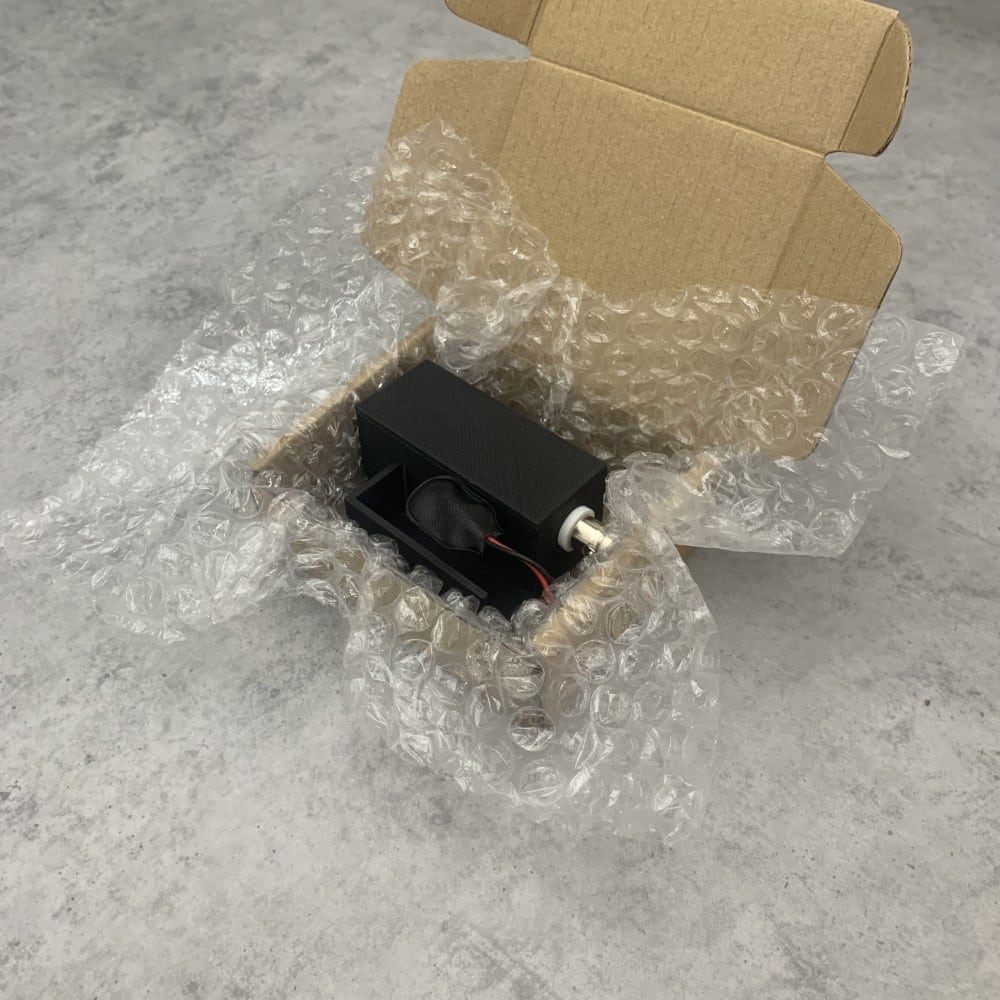
Equipment essentials
The additional equipment is also very important, a reliable set of headphones is essential for monitoring the recording in real-time and ensuring that the desired sounds are being captured effectively. Furthermore, consider visual recording equipment such as underwater cameras or depth sensors to provide additional context to the recordings and enhance the overall understanding of the underwater environment. Lastly, don’t forget about essential accessories like waterproof cases, cables, and battery packs to protect your equipment and ensure uninterrupted recording sessions.
By assembling a comprehensive set of equipment tailored to your specific recording needs, you can maximize the quality and utility of your underwater sound recordings.
For comparison between the Natako Audio lineup please visit our comparison page.
On our trip to Shorek Stream we chose Natako Audio’s AquaHear 1 hydrophone and RigidEnhancer1 preamplifier as they were perfect for our mission, to listen to gentle sounds in a stream and it is very affordable, But if you want to explore other hydrophone options you could look on Aquarian Audio which also is a good place to visit.
We used the Audacity app which is a fantastic free recording tool that we frequently rely on for capturing our listening sessions. We heard everything through our JBL Live 670NC headphones which are relatively low priced and do the job well, However, what we truly love about these headphones is their wireless functionality, a feature we greatly appreciate, especially during trips where carrying extra cables can be annoying.
Plan your recording session - 4 Rules
Before you even think to head out to your trip, you should consider these 4 rules:
1. Have a target:
Decide what you want to achieve with your recording session. Do you want to record sounds from certain ocean animals, underwater places, or natural events? Knowing what you want to do will help you plan better and concentrate on what’s important, as you’ll have to always remind yourself of the purpose that you came for.
2. Be prepared for the worse:
Get ready for how you’ll move your stuff, set up your equipment, and put it in place. Make sure you have all the right permissions to record where you want to. Stay safe by wearing the right gear for diving deep or seating for long hours, Additionally, having someone by your side in case anything goes wrong is preferable as he can save you, and also help you think about possible solutions.
3. Plan the exact time:
Determine the best time of day for your recording session based on the behaviour of the target animal species and environmental conditions, you should monitor weather forecasts and environmental conditions leading up to your recording session. Choose a day with calm weather and favourable underwater conditions, such as minimal currents (Depending on your exact plan) and good visibility, to maximize the quality of your recordings. Also, consider factors such as tidal cycles, daylight hours, and seasonal variations when scheduling your session.
4. Know your tools:
Prepare your recording gear by trying it out before you start to make sure it works right and is all set up correctly. Get to know how to use your recording device, hydrophone, and any other equipment so you can prevent problems during your session.
5. Our recommendation (BONUS):
If you are throwing your hydrophone into deep areas, where you don’t have direct access to the base of the hydrophone, you should mark the cable at each height. For example, on the 10-meter length of the cable from the hydrophone base you should write 10 meters so you’ll be able to know how deep is your hydrophone.
Record underwater sounds - 5 Steps
Finally, the good part. For your ease, we divided this section into 5 simple steps:
1. Last checks:
You don’t want yourself checking everything again, but you should check the main stuff, just for extra safety check that your most important tools are working and you are good to go. This shouldn’t take more than 10 minutes.
2. Throwing it in:
Lower the hydrophone into the water using a secure method, such as attaching it to a buoy, lowering it from a boat or simply gripping it hard with your hand. Be mindful of the depth and ensure that the hydrophone is submerged enough to capture the desired sounds, be sure you’re able to adjust its placement before you sink into the sounds of the underwater nature.
3. Adjust to the situation:
Once the hydrophone is deployed, start recording and monitor the recording in real-time if possible. This allows you to listen for any interesting sounds and adjust the positioning of the hydrophone or the preamplifier’s amplitude if needed. Be aware of anything that could go wrong and try to prevent it before it happens and if it does, don’t panic, try thinking of any possible solution and get help from your friend.
4. Disengagement:
After you finish recording, gently take out the hydrophone from the water. Be careful not to pull the cables too hard to avoid breaking them, you don’t want to cause any damage to your equipment. Wash the hydrophone to get rid of salt or dirt, and you should, if you are not in a hurry, dry it completely before putting it away.
5. After checks:
Review your recordings to assess their quality and determine if you have successfully captured the desired sounds. Take note of any interesting observations or unexpected findings. You should write down anything you think of is interesting in that time so you won’t forget later. Be sure to check that you recorded everything you wanted and you are all set to get back home. Don’t forget any equipment, it’s nice to have a check list of all the equipment that you came with to make sure you didn’t forget anything.
By doing these things and planning carefully, you can make sure your underwater recording session goes well and you get awesome sounds from underwater.
Make sure you are not Missing this
Sometimes you can be so engaged and focused on the final product of your recording that you forget the most important thing, the F U N.
You can’t just enjoy the end product, you have to enjoy the way, the process. At the end of the day, you most probably do it for the enjoyment, if it doesn’t make you happy than it’s not worth it.
When we went to recording, we didn’t just record underwater, we enjoyed the nature, brought some snacks, shot some photos and most importantly had fun. So if you feel that it’s going to be a bit boring, bring a friend or two, bring some snacks, if your trip is in or near a Nature Reserve than have a picnic or if you are on a yacht then bring food and have a lunch there.
Don’t make it a hard task to do, you should enjoy it.
Conclusion
In conclusion, recording underwater sounds using a hydrophone involves a series of steps and considerations to ensure a successful session. By thoroughly planning your recording location, choosing the right equipment, and understanding how to use it effectively, you can maximize the quality of your recordings and capture the beauty of underwater environments. Remember to prioritize safety and be prepared for any challenges that may arise during the recording process. Additionally, taking time to enjoy the experience and appreciate the natural surroundings can make the recording session even more rewarding. So, don’t forget to have fun and embrace the adventure of exploring the underwater world with your hydrophone.
finally an easy and straightforward guide. It sums it up so well